Tag Archives: Apple

How to switch watch faces using swipe gestures

A welcome addition to WatchKit 3.0 is the swipe gesture recognizer.  Previously, I used an ordinary button to switch between modes in my Watch Face app, but now I can mimic the behaviour of official watch faces by swiping left or right.

The change is quite simple to make too. First, you just need a Group control that contains an image (into which you’ll draw the watch face). Then, you drag a couple of Swipe Gesture Recognizers into the group, and change the properties so that one is a left swipe and the other is a right swipe.

Having done that, you need to insert an action for each of the gestures – you can do that by control-dragging from the gesture in the storyboard outline into the InterfaceController code. Make sure to add an action (rather than an outlet) – that way, Xcode will create a stub method for you with the correct signature.

The logic for the swipe gesture just switches between watch faces then re-draws the time:

    // Tissot --> Hermes --> Roman
    @IBAction func swipeRight(_ sender: Any) {
        switch (watchFace.id())
        {
        case WatchFaceId.tissot: watchFace = HermesWatchFace()
        case WatchFaceId.hermes: watchFace = RomanWatchFace()
        case WatchFaceId.roman: watchFace = TissotWatchFace()
        }
        
        drawTime() // refresh with updated background & different styles
    }

and the left swipe reverses the transition order.

See also this earlier post that explains how you can draw directly into an image in WatchKit – combined with the swipe gesture recogniser, it provides a neat way to switch between different modes in any app.

Leave a comment

Filed under Swift

How to draw text onto an image in Apple Watch App

Suppose you want to label an item in your WatchKit App. If you’re able to put a label widget onto the storyboard next to the item, that’s fine – but if you’re using Core Graphics to construct an overlay image, chances are you’ll need to draw the text onto the image too. My ultimate aim was to be able to draw the date on my Watch Face App.

It took some digging to find out how to do this. The obvious candidate was CoreGraphics.CGContextShowTextAtPoint, but that’s deprecated from WatchKit 2.0 onwards. Its replacement is the CoreText library, but “import CoreText” doesn’t find it.

CGContextShowTextAtPoint

Searching on StackOverflow met with little success, possibly because people’s solutions might work for iPhone Apps but don’t satisfy the restricted API available for WatchKit Apps. However, I found this gem which did work on the Apple Watch.

As a worked example, let’s take the Treasure Map App from an earlier post. It’s natural for a treasure map to indicate what’s buried at the cross. I’ve changed the method signature from the one on StackOverflow so that you specify the centre of the text block.

    func drawText( context : CGContext?, text : NSString, centreX : CGFloat, centreY : CGFloat )
    {
        let attributes = [
            NSFontAttributeName : UIFont.systemFontOfSize( 20 ),
            NSForegroundColorAttributeName : UIColor.blackColor()
        ]
        
        let textSize = text.sizeWithAttributes( attributes )
        
        text.drawInRect(
            CGRectMake( centreX - textSize.width / 2.0,
                        centreY - textSize.height / 2.0,
                        textSize.width,
                        textSize.height ),
            withAttributes : attributes )
    }    

Calling this from drawCross() in the Treasure Map App results in a neat label underneath the cross:

        drawText( context, text: "Gold", centreX: 100, centreY: 210 )

Screen Shot 2016-08-05 at 08.00.08

Using the same method, I updated my Watch Face App to draw the day and date onto this watch face:

Screen Shot 2016-08-07 at 21.28.23

See also: How to write a Watch Face App for Apple Watch and How to draw on top of an image in Apple WatchKit

1 Comment

Filed under Programming, Swift

How to write a Watch Face App for Apple Watch

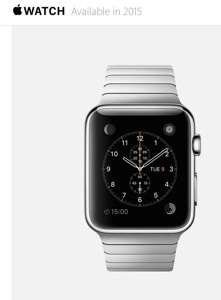
Having owned an Apple Watch for over a year, I’ve grown a little bored with the available watch faces. So I was very impressed with the new, special edition Hermes watch face. This is quite different to any of the other faces on the Apple Watch. Unfortunately, it’s only available to new purchasers who buy the brand new Hermes Apple Watch – starting at £1000.
HermesFace2

Having written my first Watch App recently, I thought I’d have a go at writing a Watch Face App. Apple WatchKit doesn’t officially support writing watch faces, so this would have to be an ordinary App that happens to display the time. There are plenty of custom faces you can use as wall-paper to create an attractive digital watch, but I wanted the analogue look.

The approach I took was:

  • Start with an image e.g. from the custom faces library
  • Look up how to get the current time in the WatchKit API
  • Find out how to draw graphics on top of an image
  • Work out the maths to draw the hands in the right place
  • Work out how to render proper watch hands

I already blogged about how to get the current time and how to draw graphics on top of an image. So if you followed along, you can replace your Treasure Map image with a watch face image and use the createContext(), drawLine() and applyContextToImage() methods to draw the hour and minute hands. In fact, by making the colour a parameter of drawLine(), you’ve got the method to draw the second hand too.

As for the maths to draw the hands in the right place, it’s trigonometry. Both sin and cos are available in WatchKit, so convert the hours/minutes into radians and calculate the end coordinate of your watch hand, treating the length of the hand as the hypotenuse of a right-angled triangle.

[edit]I had a request to post the maths for this. Suppose you want to draw a hand at 12 minutes past. Convert that into a fraction of how far the hand has moved – here, 12 mins out of a possible 60 mins. Then work out whether it’s in the top-right, bottom-right, bottom-left or top-left quadrant of the watch face (that affects which sin/cos functions you’ll use) – here, 12/60 = 0.2, so it’s between 0.0 and 0.25, hence it’s in the first quadrant.

To calculate the x and y coordinates for the top-right quadrant, we form a right-angled triangle between the hand and the y-axis. The hand forms the hypotenuse of the triangle, let’s choose length = 100. So knowing the minutes as a fraction, and the length of the hand, here’s a function to calculate the x and y coordinates as an offset from the centre of the watch face, using trigonometry:

func handCoordinate( _ fraction : CGFloat, length : CGFloat ) -> (x : CGFloat, y : CGFloat )
{
    let x : CGFloat, y : CGFloat

    if ( 0 <= fraction && fraction < 0.25 )
    {
        let theta = CGFloat( (fraction/0.25) * π / 2.0 )
        x = length * sin( theta )
        y = -1.0 * length * cos( theta )
    }
    else
    {
        // remaining quadrants left as exercise for the reader!
    }
    
    return (x,y)
}

The simplest way of drawing the hand is then a simple drawLine() from (centreX, centreY) to (centreX + x, centreY + y). For my 42mm watch, centreX and centreY are (156,150) – other sizes will vary.
[/edit]

That leaves the trick of how to draw a proper watch hand given only the drawLine() and drawCircle() methods. This is the method I used:

WatchHand

In order to draw the white circle outline with solid black inner-circle, I used this method:

    func drawCircle( context : CGContext?, radius : CGFloat, centreX : CGFloat, centreY : CGFloat, colour : CGColor )
    {
        let diameter = radius * 2.0
        let rect = CGRect( x: centreX - radius, y : centreY - radius, width : diameter, height : diameter )
        
        CGContextSetFillColorWithColor( context, UIColor.blackColor().CGColor )
        CGContextFillEllipseInRect( context, rect )
        
        CGContextSetLineWidth( context, 2.0 )
        CGContextSetStrokeColorWithColor( context, colour )
        CGContextStrokeEllipseInRect( context, rect )
    }

There are a couple of limitations:

That said, I’m really happy with the results:

Watch Face App

This is actually one Watch App – I changed the Image to a Button so that I could iterate through different watch faces by tapping the watch. If you do this, call button.setBackgroundImage on the button instead of image.setImage.

See also: How to draw text onto an image and How to draw on top of an image.

11 Comments

Filed under Programming, Swift

How to draw on top of an image in Apple WatchKit

Suppose you’re writing a simple game for Apple Watch – for example, you might have a treasure map image and you want to render a cross on it in a random position to locate the treasure.
treasure-map
This is tricky, because WatchKit severely limits your options for laying out UI primitives on the screen. For example, if you put a label and an image onto a StoryBoard, it will tile them (rather than letting you put one on top of the other).

The approach I’ve adopted is:

  • Create a Group in the story board and set its background image
  • Add an image view within the Group
  • Create a context and use CoreGraphics to write into it
  • Apply the context to the image view

Set up a new iOS WatchKit App, then drag a Group and Image from the Object Library onto the storyboard:
TreasureMap StoryBoard

In the WatchKit App assets, create a new image set and drag your background image onto the x2 outline:
TreasureMap ImageSet

Set the background image on the group:
TreasureMap SetBackground

Then create an outlet in the InterfaceController for the image – one way is to control-drag from the outline view of the storyboard into the interface controller’s swift file. I called mine OverlayImage to convey the purpose.

Finally, add the code that will leverage the CoreGraphics library to draw into the overlay – the work is done in drawCross() which is called from awakeWithContext(). I’ve split out line and circle drawing methods for clarity.

class InterfaceController: WKInterfaceController {
    // Create by control-dragging to the StoryBoard
    @IBOutlet var OverlayImage: WKInterfaceImage!
    
    let imageWidth : CGFloat = 312.0
    let imageHeight : CGFloat = 348.0 // 390 - 42 for status bar on 42mm watch
    
    override func awakeWithContext(context: AnyObject?) {
        super.awakeWithContext(context)
        drawCross()
    }

    override func willActivate() { ... } // standard
    override func didDeactivate() { ... } // standard
    
    func drawCross()
    {
        // Begin image context and grab context
        let context = createContext()
        
        // Draw our primitives
        drawLine( context, startX: 75, startY: 150, endX: 125, endY: 200 )
        drawLine( context, startX: 75, startY: 200, endX: 125, endY: 150 )
        drawCircle( context, radius : 10, centreX : 100, centreY : 175 )
        
        // End by applying our graphics to the Overlay image
        applyContextToImage( context )
    }
    
    func createContext() -> CGContext?
    {
        // The 'opaque' parameter is false, so that we overlay 
        // rather than the static image underneath
        UIGraphicsBeginImageContextWithOptions( CGSizeMake( imageWidth, imageHeight ), false, 0 )
        let context = UIGraphicsGetCurrentContext()
        CGContextBeginPath( context )
        
        return context
    }
    
    func drawLine( context : CGContext?, startX : CGFloat, startY : CGFloat, endX : CGFloat, endY : CGFloat )
    {
        CGContextSetStrokeColorWithColor( context, UIColor.blackColor().CGColor )
        CGContextSetLineWidth(context, 3.0)
        CGContextMoveToPoint( context, startX, startY )
        CGContextAddLineToPoint( context, endX, endY )
        CGContextStrokePath( context )
    }
    
    func drawCircle( context : CGContext?, radius : CGFloat, centreX : CGFloat, centreY : CGFloat )
    {
        let diameter = radius * 2.0
        let rect = CGRect( x: centreX - radius, y : centreY - radius, width : diameter, height : diameter )
        
        CGContextSetLineWidth( context, 3.0 )
        CGContextSetStrokeColorWithColor( context, UIColor.blackColor().CGColor )
        CGContextStrokeEllipseInRect( context, rect )
    }
    
    func applyContextToImage( context : CGContext? )
    {
        let img = UIGraphicsGetImageFromCurrentImageContext()
        UIGraphicsEndImageContext()
        OverlayImage.setImage( img )
    }

All being well, you can now run your WatchKit App and check that the black cross and circle have been drawn on top of the background image!

TreasureMap WatchApp

3 Comments

Filed under Programming, Swift

How to upload iOS App onto iPhone

XcodeI’ve been working on a hobby project for a while, learning Swift and gaining some experience of iOS App development. I reached the stage where the app was worth testing on my iPhone, but found that my version of Xcode (an early v7 beta) required an Apple Developer Licence!

Fortunately, it turns out that upgrading to Xcode 7.2 meant that I could upload to my own phone simply by providing my Apple ID. The upgrade was much easier than I had expected, compared to the number of bad reports on the internet. I used the App Store to upgrade, maybe it’s harder if you download and install the application directly.

Next, I had to find out how to install an application on my device from Xcode. First, connect the device to the Macbook and it will appear in the device list in Xcode above the simulated devices (i.e. all the iPhone and iPad models). Selecting the device by name and clicking run kicks off a full install and runs the app on the phone.

The final question was how to configure my phone to allow apps written by me to run – this was answered on the Apple Developer Forum, and is simply a matter of becoming familiar with Settings -> General -> Profile / Developer App.

I’m impressed by how well Xcode has automated this process, I’m sure a lot of work has gone into making installation onto a device a positive developer experience.

Leave a comment

Filed under Programming, Swift

Video: Introducing WatchKit OS2

Catching up with this Intro to WatchKit OS2.  I found the following points interesting:

  • ClockKit has templates for watch kit complications, matching the different shapes and sizes available on the various watch faces
  • Complications should be immediately up to date when viewed, so watch kit allows you to bulk upload e.g. a timeline for a calendar widget that changes during the day.
  • Watch connectivity allows data sharing between phone and watch
  • CoreMotion, CoreLocation, MapKit and HealthKit APIs are available on the Watch

Leave a comment

Filed under Swift, Video

Video: Designing for Apple Watch

I watched this excellent video about Designing for Apple Watch from WWDC.  Some interesting take-aways:

  • Interaction with the watch is expected to be 5 seconds.  Any longer, you should steer the user towards the iPhone (e.g. via hand-off).
  • Notifications on the watch are much more noticeable, so should be kept to a minimum
  • The force-touch provides a context-sensitive menu whichever screen the user is on.  Although it’s less discoverable, it avoids the need for multiple swipes to reach an action screen.
  • The watch has a bezel!  But it’s only visible if your app doesn’t have a black background.  Interestingly, one of their recommend Apps, Toby (a cute dog) has a blue background that breaks Apple’s own guidelines.
  • Their are guidelines for the haptic/auditory feedback for events such as Notification, Up, Down, Success, Failure, Retry, Start, Stop, Click.  For consistency, Apple need *every* developer to use the right effect with the right event – otherwise, users won’t intuitively know the meaning across different App contexts.
  • The click event is interesting – it gives granularity to adjustments, but could easily be over-played – so it’s recommend to exercise restraint.
  • There are templates for glances – and they should “deep link” to the main App for more information.  Again, consistency of layout between the glances for different Apps is important to the continuity of experience for users.
  • Sessions are available for longer interaction with a watch app, intended for fitness apps (e.g. a period in the gym). Yet again, it’s easy to see App developers over-using this feature to avoid the watch returning to the time screen.

Much relies on Apple policing these guidelines, which could be a lot of work.

Leave a comment

Filed under Swift

Swift: Tutorial

swiftHaving recently purchased an Apple Watch, I’ve decided to learn Swift so that I can write a couple of Apps. So far, I’ve been very impressed with the language.

Here’s the link to the tutorial.

However, I’m completely bemused by the rules for named parameters. Unlike in F#, which optionally supports named parameters in calls to function if you want to use them, Swift 2.0 enforces that you must use them (except where you mustn’t, like the first parameter in the call). Seriously? I understand that, for functions with multiple parameters of the same type, it can be helpful to name the parameters – but making that a requirement on every call will seriously reduce productivity.  And what about refactoring – if I change the name of a parameter, will I have to change its name at all call sites as well?

Leave a comment

Filed under Swift

Apple Watch – awesome charger for UK

Apparently, the Apple Watch has a foldable charger in the UK. If this is it, it’s certainly innovative and begs the question why no one else has put a slimmer design on the market.

2 Comments

Filed under Technology

Apple Watch – the new old watch

Apple have finally announced the Apple Watch. Based on the publicity photographs and rushed reviews that have been published so far, I’m a fan and will probably buy one. But it struck me that the grand new innovation, the Digital Crown, is hardly ground-breaking – my current Tissot watch has had it for ten years!
Tissot classicApple Watch

You see, the functions on my classic Tissot watch are entirely driven by the bezel. As well as the analogue time, it has a stopwatch, timer and digital date/time display.
The bezel acts in several modes:

  • Rotate slowly to change hours
  • Rotate quickly to change minutes
  • Press to start/stop timer or stopwatch
  • Pull out to change the time

What’s really clever is that, when the digital functions are hidden, the watch looks completely analogue. And the bezel reacts according to mode – it only bleeps when you press in stopwatch/timer mode, and ignores the press otherwise.

So whilst the Apple Watch is my next watch, my classic Tissot watch was there first.

1 Comment

Filed under Musing, Technology